Set up Evie on Your Domain with a Google Workspace Account

 APPLICABLE TO:  Professional or Enterprise Plans only

Here's how you can configure Evie on your company domain (evie@mycompany.com) for Google Workspace:

Part A: Create a new Google Workspace user for your new assistant

1. Log in to the Google Workspace Admin Console
Log in to the Google Suite Admin Console (https://admin.google.com/) for your domain. You'll need to use an account with Administrator privileges.

2. Click on 'Users' and create an actual licensed user evie@mycompany.com  in your Google Workspace - this will require an additional Google Workspace license

3. After creating the new Workspace user, open an incognito window and go to https://myaccount.google.com/

4. Sign in as the new user you created (evie@mycompany.com, NOT yourself)

5. Follow steps 2-8 per the instructions here to generate an app-specific password: https://support.google.com/mail/answer/185833?hl=en

6. Take note of the 16-digit password that is generated and reach out to us at hello@evie.ai

7. While waiting for us to confirm that we can connect successfully with the account, you can proceed to Part B


Part B: Set up Forwarding for Inbound Emails to Evie

1. Log in or return to the Google Workspace Admin Console
Log in to the Google Suite Admin Console (https://admin.google.com/) for your domain. You'll need to use an account with Administrator privileges.

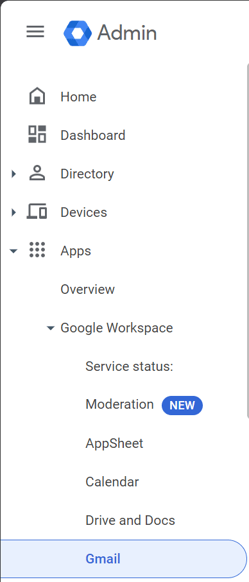
2. In the left navigation panel, click on "Apps", then "Google Workspace", then "Gmail".

Google-Workspace-Admin-GMail-Nav-2024.02.13
 

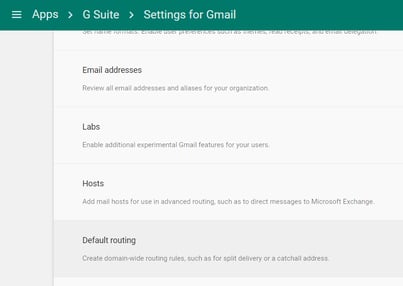
3. Click on the "Default Routing" option.

(Don't see the "Default Routing" option? You're probably using the free version of Google Suite, which will require our Enterprise plan. Please contact us at hello@evie.ai for further details.)

Default Routing

4. Click the "Add Setting" link.

Add Setting

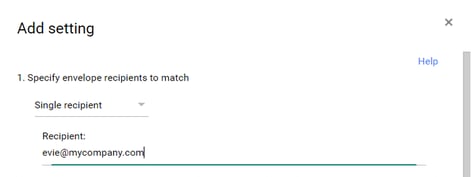
5. Add your assistant email address.
Under section 1, specify the email address of your new assistant as a recipient (evie@mycompany.com) (replace ‘mycompany.com’ with your domain).

Add your assistant email address

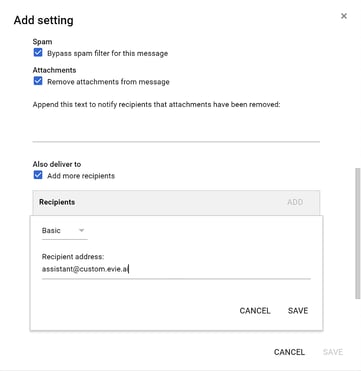
8. Scroll down and check the options "Bypass spam filter for this message" and "Remove attachments from message".


9. Then click on “Add more recipients”, click on the “ADD” button and enter assistant@custom.evie.ai and click the Save button.

Add Setting

10. Under section 3 (Options), select “Perform this action on non-recognized and recognized addresses”.

Under section 3 (Options)


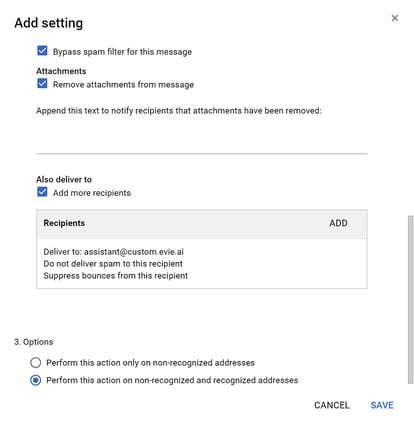
11. Scroll down and click “Save” to save your changes and close the dialog box.


Once you have completed Part A & B above and we have confirmed that we have connected successfully to your account (from Part A), you can send a test email to your company's Evie (evie@mycompany.com).

Then visit your Evie dashboard, click on the "Settings" tab and verify that   evie@company.com is marked as "Active" (note that this may take up to 5 minutes to update)

If the status still remains "pending" after 15 minutes of sending your test email, please review your settings in Part B above to ensure they match exactly.  If you are still experiencing difficulty, just reach out to us at hello@evie.ai!

Quickly Deploy with Zero Integration.

Contact us for a demo & work out a trial.